
Microsoft Security Essentials provides protection against viruses,
spyware, and other malicious software. Security Essentials scans your
computer for threats and keeps out new threats. Security Essentials does
not come installed on the computer, but is available as a free download
from Microsoft.


NOTE: If you have antivirus software installed, but want to install different antivirus software, remove the old antivirus software before installing new software. This might prevent software conflict problems.
Downloading and installing Microsoft Security Essentials
Microsoft
Security Essentials is available as a free download for all computers
running a genuine version of Windows. Follow these steps to install
Security Essentials:
- Click Free download .
- Microsoft detects your operating system and begins to download the options appropriate to your operating system.
- If a Security Warning window opens, click Run .Figure 1: Security Warning
 5. If a second Security Warning window opens, click Run .Figure 2: Security Warning
 6. On the welcome screen, click Next .Figure 3: Installation Wizard welcome screen
 7. Proceed through the steps to install Microsoft Security Essentials8. When the installation is complete, click Finish .Figure 4: Installation is complete
 An Update screen displays, while Security Essentials scans the Microsoft site for the latest updates to virus and spyware definitions. Any necessary updates are installed on your computer. When the scan is complete, close the software.Figure 5: Update screenScanning the computer for security threats
 Microsoft Security Essentials can perform a quick scan of the most common places threats are found, a full scan of the entire system, or a custom scan of the drives and folders you select. Follow these steps to scan the computer for security threats:
- To open Microsoft Security Essentials, click Start , All Programs , then click Microsoft Security Essentials .
- Open the Home tab.
- Select one of the scan options, and then click Scan now :
- Quick - Scans the folders most likely to contain security threats.
- Full - Scans the entire system.
- Custom - Scans drives and folders that you choose.
Figure 6: Scan options 4. Security Essentials scans the computer for security threats.Figure 7: Scanning
 When the scan is complete, a screen displays the scan results. If the scan finds threats, a list of those threats displays. If the scan does not find threats, a No threats were detected on your computer during this scan message displays.Figure 8: Scan results screen
 Scheduling scansSecurity Essentials can scan your computer automatically every week at the same time. Follow these steps to schedule a weekly scan:
- Open the Settings tab.
- Click Scheduled scan .Figure 9: Scheduled scan

- Check the box next to Run a scheduled scan on my computer (recommended) .
- Select the scan type (Quick or Full), the day, and the time. Then, click the check boxes for the other scheduling conditions you wish to apply.
- Click Save changes . Security Essentials scans the computer weekly on the day and time set.
Opening Microsoft Security EssentialsTo open Microsoft Security Essentials, click Start , All Programs , then click Microsoft Security Essentials .Home tabThe Home tab displays the status of real-time protection as well as virus and spyware definitions. You can perform a quick, full, or custom scan from the Home tab.Figure 10: Home tab Update tabThe Update tab displays the status of the virus and spyware definitions. Click Update to check for updates.Figure 11: Update tab
 History tabThe History tab displays all the items that Security Essentials detects as potentially harmful and the action taken on each item.Figure 12: History tab
 Settings tabUse the Settings tab to schedule a scan, set default actions, turn on or off real-time protection, exclude files, folders or processes, and manage Microsoft SpyNet membership.Figure 13: Settings tab
 Changing settingsOn the Settings tab, you can schedule a scan, set default actions, turn on or off real-time protection, exclude files, folders or processes, and manage Microsoft SpyNet membership. Use the following sections to change Security Essentials settings.Changing scheduled scansSecurity Essentials can run scheduled scans once a week. Follow these steps to change the scan type, day of week, or time of day:Click Scheduled scan .Figure 14: Scheduled scan
- Check the box next to Run a scheduled scan on my computer (recommended) .
- Select the day of the scan type (Quick or Full), week, and time of day.
- Click Save changes . Security Essentials scans the computer weekly on the day and time set.
Security Essentials can automatically deal with security threats. Follow these steps to set the default actions that Security Essentials performs when it detects potential security threats:Click Default actions .Figure 15: Default actions
- For each alert level, select the action for Security Essentials to perform (Recommended action , Remove , or Quarantine ).
- Click Save changes .
Real-time protection alerts you to potentially dangerous software as it attempts to install itself or run on your computer. Follow these steps to turn on or off real-time protection and change protection settings:Click Real-time protection .Figure 16: Real-time protection settings
- Turn on or off real-time protection and choose whether Security Essentials monitors file and program activity and scans downloads.
- Click Save changes .
You can exclude certain files and locations to speed up security scans. However, doing so may leave your computer less protected against security threats. Follow these steps to exclude files and folders from scans:Click Excluded files and locations .Figure 17: Excluded files and locations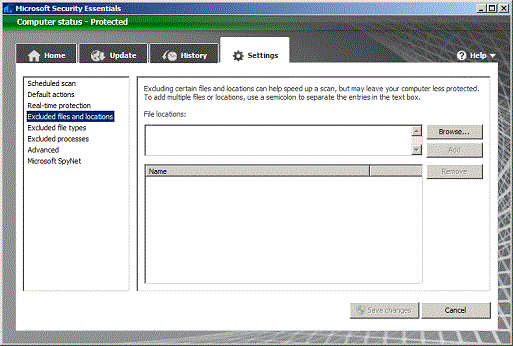
- Click Add .
- Browse to a drive, folder or file that you want to exclude from security scans, and then click OK .
- Repeat steps 2 and 3 for each drive, folder or file that you want to exclude.
- Click Save changes .
You can exclude certain file types to speed up security scans. However, doing so may leave your computer less protected against security threats. Follow these steps to exclude certain file types from scans:Click Excluded file types .Figure 18: Excluded file types
- Enter a file type (for example, .jpeg ) into the open field.
- Click Add .Repeat steps 2 and 3 for each file type you want to exclude.
- Click Save changes .
You can exclude certain processes (ending in .cmd, .bat, .pif, .scf, .exe, .com, or .scr) to speed up security scans. However, doing so may leave your computer less protected against security threats. Follow these steps to exclude certain processes from scans:Click Excluded processes .Figure 19: Excluded processes
- Click Add .
- Browse to a process (ending in .cmd, .bat, .pif, .scf, .exe, .com, or .scr) that you want to exclude from security scans, and then click OK .
- Repeat steps 2 and 3 for each process you want to exclude.
- Click Save changes .
Security Essentials allows you to change advanced settings, such as whether to scan archives and removable drives, create system restore points before cleaning the computer, and allow users to view the history. Follow these steps to change advanced settings:Click Advanced .Figure 20: Advanced settings
- Make any desired changes to the advanced settings.
- Click Save changes .
SpyNet is a Microsoft online community that collects information about potential threats. With basic membership, the information can include where the software came from, actions taken, and whether the actions were successful. With advanced membership, Security Essentials sends all of the basic information plus the location of the software on the computer, the file names, how the software operates and the impact to the computer.Follow these steps to set the Microsoft SpyNet membership level:Click Microsoft SpyNet .Figure 21: Microsoft SpyNet settings
- Select Basic membership or Advanced membership .
- Click Save changes .
AND ENJOY...


1 Comments
Have a look at my web site ... click through the next web site - -
Be the first to comment!
Don't just read and walk away, Your Feedback Is Always Appreciated. I will always reply to your queries.
Regards:
Noble J Ozogbuda
Back To Home