
It was the day after CES 2011. I sat by my gate, watching dozens of
techies road warriors running up and down the airport with their bags in
one hand and laptops in the other. All hunting for one thing: the last
free power outlet to charge up their laptops (well, that and a
double-shot espresso from Starbucks).
 It astounds me that — even in 2011 — battery life is one of the most
precious factors of our mobile IT world. Yet, many business laptops
struggle to deliver more than three hours when performing even average
tasks. This is a big concern, whether you’re an IT manager in charge of a
mobile workforce or on the road yourself.
It astounds me that — even in 2011 — battery life is one of the most
precious factors of our mobile IT world. Yet, many business laptops
struggle to deliver more than three hours when performing even average
tasks. This is a big concern, whether you’re an IT manager in charge of a
mobile workforce or on the road yourself.
A fast draining battery kills your efficiency in places with no electrical outlet in sight. It forces you to waste money on spare lithium-ion batteries (or even more expensive external battery packs) that you need to schlepp around in your bag. Good news: There’s a lot you can do about it. In this blog post, you’ll find out the five most effective techniques to save battery life on your Windows notebooks.

The rest of the energy output is almost equally divided by the CPU, hard disk, graphics card, network card, and chipset. Obviously, on a more powerful computer, the CPU/GPU combination takes up a bigger chunk of the power equation.
Whether as an IT administrator or user, it is your goal to keep the power consumption of all hardware components to a minimum. This is done by restricting performance levels, by forcing the computer to enter lower power states sooner, and, most often, by disabling (currently) unneeded hardware components.
The next five recommendations show you exactly how to do that – both on the hardware and on the software side.


On one laptop in my test lab, the meter jumped from 2½ hours to almost 4 hours. Obviously, your mileage may vary.
As readers of this site, switching between power plans won’t be a big revelation; you do that already, correct? What you probably didn’t know is that “power saver” is a compromise. I’d almost go a bit further and call it a little misleading. While that software utility takes every possible step to power down unused USB devices, network cards, the hard disk, and the graphics bus, it still lets the processor clock to its maximum speed and eat up all the power it needs.
Here’s how I tested this theory (and so can you): I started a compression of about 2,500 jpg images from their original 5284x3456 resolution down to 1920x1080 pixels. The process causes an 1-hour-long CPU usage of about 75% on a Core 2 Duo with 2.93 GHz. Using a CPU monitor (in my example NVIDIA System Monitor), I noticed that even when the “Power Saver” plan is active, the CPU rarely clocked down to its lowest power saving setting, in this case 1.6 GHz. About 50% of the time, it used a much higher clock speed, varying between 2.2, 2.5, and even the maximum of 2.93 GHz. This, in turn, caused the processor to heat up and the fans to spin faster. Battery life goes down the drain.

Enough with the tech talk, the bottom line: “Power saver” should provide the absolute maximum amount of battery life by reducing performance to a minimum. No compromise.
Step 1: Creating the perfect power saver plan: Click on the battery icon on your task bar and select “More power options.” Select the “Create a power plan” setting in the left pane. Choose “Power saver” as a basis for your new plan and name it whatever you want, such as “Maximum Battery Life.” Hit “Next” and “Create.”
Go to the “Change plan settings” entry of your new power plan and choose “Change advanced power settings.” It’s generally recommended to go through all 12 entries carefully to make sure that this plan really safes as much energy as possible. For now, only the “Processor power management” entry is important. Expand it to see the current setting. By default, the “Minimum processor state” is at 5%. The “Maximum processor state” is at 100%. To optimize battery life, make sure to type “0%” into each input field:

Forcing the processor to stay at a low clock speed saves battery life.
By doing so, you limit the clock speed to its minimum. On my 2.93GHz system, that’s 1.6 GHz for all four cores. On another 1.83 GHz Core 2 Duo laptop, this reduces the clock to about 1 GHz.
Don’t let that low clock speed scare you. I guarantee you that even on 3+ year-old laptop, basic tasks such as browsing the Web or running office applications will run without a noticeable performance difference. However, if you find the performance to be unacceptable, try increasing the processor states by an increment of 10% until you hit the perfect sweet spot. To enable the plan, simply go to the power plan selection screen and check “Maximum Battery Life.”
Step 2: Exporting your new and more effective power plan: If you’re in charge of an entire fleet of laptops, it might be wise to export this power plan as a handy file and deploy it over your network. Simply follow these steps: Open up a command prompt with administrative privileges (right-click on the “command prompt” shortcut and select “Run as administrator”). Enter

Voila! The power plan is now ready to be deployed on any number of laptops using the “powercfg –import path\power_plan_name.pow” command. You could even include it in any custom Windows setup images for further deployment.
Windows 7’s hardware power management tries to power-down or selectively suspend many devices and buses. For example, it automatically turn off Wi-fi radios when they are not in use and puts Ethernet devices in a low power mode when no network cable is plugged in. Unfortunately, not all devices (or their drivers, see #3) support low power modes or manage them effectively. Use hardware keys on your laptop (if present), the OEM power management software (if pre-installed), or at the very least Windows Device Manager to turn off devices that you may not need on the road. Among them may be:
Turning off devices, however, can be a chore. It is not feasible if you need to do it manually or if you must preach to your ever-complaining IT workforce to perform these actions every time they board a plane or go for a long train ride. You need an automated solution.
The easy way: A handful of commercial third party products can automatically disable (at least some) devices. One noteworthy software solution is Battery Optimizer, which diagnoses power consumption of the most critical hardware components (as well as software processes), gives you an estimate on the potential battery life it can achieve, and lets you save energy just with a mouse-click.

Battery Optimizer is a neat solution for saving power with one click.
The techie way: A less costly alternative is a bit more complicated and not so sleek. Microsoft’s very own “DevCon.exe” is available from the Microsoft Knowledge Base (for Windows XP and Windows Vista) or in a more recent and 100% Windows 7 compatible version as a part of the Windows Driver Kit (read these instructions on how to extract the latest devcon version from the kit). This command-line tool can be used to disable devices based on either their unique hardware ID or hardware class. For a detailed list of Devcon commands (“Enable” and “Disable” especially will help your cause), this MSDN topic will help you out.
If you have one single hardware configuration across your enterprise, you can use devcon.exe to create a custom script which disables specific devices of your laptops at once and re-enables them, all with a single mouse-click. I suggest experimenting with devcon.exe a bit to see if it fits your needs and if you can use it in a custom script for your enterprise.
Here’s how it works: First, open Device Manager and find the specific device you’d like to disable, for example the network adapter. Go to its “Details” page and find either “hardware ID” or “compatible ID.” Now, use one of these IDs (the first works fine) to disable the device using devcon.com:


Step 2: Use the “enable” parameter to re-enable the device. Use
both methods to develop a custom script that disables and enables as
many devices as you wish with one click.Here’s an example script (developed by a Microsoft MVP) that disables a specific wireless adapter in a single batch file.
Here’s a quick checklist for a perfectly optimized system:


In this example, “wmpnetwk” is responsible for an average of 6% CPU usage. A quick research reveals that this is the process name behind the “Windows Media Player Network Sharing Service,” which is definitely not needed on this specific system. It is quickly disabled from within Windows service management:

If you find program processes in this list, evaluate carefully if you need them during your day-to-day work, on the go. Disable them if not, or avoid using them constantly as much as you can!

Pre-installed or inbox drivers are your worst choice – not only when it comes to saving battery life. Version 1 drivers are designed to “just make it work” and rarely are optimized for energy efficiency or performance. This is why it’s critical that drivers for all major hardware components of your laptop fleet are up-to-date, including the chipset, graphics card (onboard or dedicated), network adapter, and sound chip.
Here’s just one example of what a newer driver (in this case, for a Wi-Fi adapter) can do:

Depending on much time you’re connected to a Wi-Fi network, this might make a huge difference in battery life. But don’t assume that newer is always better. Newer drivers may also consume more power. I’ve seen that happen with a newer graphics driver that (due to a bug) prevented the GPU from clocking down accordingly, thus sucking up battery life much quicker.
My advice: Make sure to include a series of battery life benchmarks when evaluating drivers before rolling them out in your IT infrastructure.
1. Open up a command prompt and type in the following command:

2. Wait for the trace to finish and go to your user folder under “C:\Users\Your_username”. In it, you’ll find an HTML called “energy-report.” Open it!

If the second value reaches critical levels (lower than 60-70% of its original capacity), you might think about replacing the battery. If this is a newer machine, a low full charge value might be reason to contact the manufacturer and ask for a replacement.
In order for Lithium-Ion batteries to stay healthy for longer periods of time, you need to treat them carefully. Here’s some final bit of advice:
Follow these five steps closely, both on your private laptop and in your business fleet, to ensure the best possible productivity for the mobile road warrior. It will be a struggle at first, finding the right balance between performance/functionality of your laptop and its battery life. After these suggestions and a short evaluation period, you will find the perfect balance. In the end, you’ll work more relaxed, knowing that on an international flight or a five hour train trip, you will still be working when all other screens have long gone dark.
A fast draining battery kills your efficiency in places with no electrical outlet in sight. It forces you to waste money on spare lithium-ion batteries (or even more expensive external battery packs) that you need to schlepp around in your bag. Good news: There’s a lot you can do about it. In this blog post, you’ll find out the five most effective techniques to save battery life on your Windows notebooks.
Why Laptops Run Out of Juice Sooner Than Expected
According to Microsoft’s own telemetry data, almost 50% of a laptop’s power goes to the LCD screen. Bigger and brighter panels require more power input, thus quickly draining battery life fast. It’s also the reason you’ll experience ridiculously low battery life on these huge 17” or even 18.4” laptops — in many cases barely topping the two hour mark.
The rest of the energy output is almost equally divided by the CPU, hard disk, graphics card, network card, and chipset. Obviously, on a more powerful computer, the CPU/GPU combination takes up a bigger chunk of the power equation.
Whether as an IT administrator or user, it is your goal to keep the power consumption of all hardware components to a minimum. This is done by restricting performance levels, by forcing the computer to enter lower power states sooner, and, most often, by disabling (currently) unneeded hardware components.
The next five recommendations show you exactly how to do that – both on the hardware and on the software side.
Recommendation #1: Optimize Windows 7’s power plans
Switching between Windows’s built-in power plans is a well-known and nice first step to save battery life. Depending on the laptop’s hardware and battery, going from “High Performance” to “Energy saver” boosts the total uptime almost instantly.On one laptop in my test lab, the meter jumped from 2½ hours to almost 4 hours. Obviously, your mileage may vary.
As readers of this site, switching between power plans won’t be a big revelation; you do that already, correct? What you probably didn’t know is that “power saver” is a compromise. I’d almost go a bit further and call it a little misleading. While that software utility takes every possible step to power down unused USB devices, network cards, the hard disk, and the graphics bus, it still lets the processor clock to its maximum speed and eat up all the power it needs.
Here’s how I tested this theory (and so can you): I started a compression of about 2,500 jpg images from their original 5284x3456 resolution down to 1920x1080 pixels. The process causes an 1-hour-long CPU usage of about 75% on a Core 2 Duo with 2.93 GHz. Using a CPU monitor (in my example NVIDIA System Monitor), I noticed that even when the “Power Saver” plan is active, the CPU rarely clocked down to its lowest power saving setting, in this case 1.6 GHz. About 50% of the time, it used a much higher clock speed, varying between 2.2, 2.5, and even the maximum of 2.93 GHz. This, in turn, caused the processor to heat up and the fans to spin faster. Battery life goes down the drain.
Enough with the tech talk, the bottom line: “Power saver” should provide the absolute maximum amount of battery life by reducing performance to a minimum. No compromise.
- If I want a compromise, I’d select the default “Balanced” power plan.
- If I want raw performance, I’d choose the “High Performance” plan instead.
- If I want battery life, I don’t care if performance suffers as long as I can stay productive for as long as I want.
Step 1: Creating the perfect power saver plan: Click on the battery icon on your task bar and select “More power options.” Select the “Create a power plan” setting in the left pane. Choose “Power saver” as a basis for your new plan and name it whatever you want, such as “Maximum Battery Life.” Hit “Next” and “Create.”
Go to the “Change plan settings” entry of your new power plan and choose “Change advanced power settings.” It’s generally recommended to go through all 12 entries carefully to make sure that this plan really safes as much energy as possible. For now, only the “Processor power management” entry is important. Expand it to see the current setting. By default, the “Minimum processor state” is at 5%. The “Maximum processor state” is at 100%. To optimize battery life, make sure to type “0%” into each input field:
Forcing the processor to stay at a low clock speed saves battery life.
By doing so, you limit the clock speed to its minimum. On my 2.93GHz system, that’s 1.6 GHz for all four cores. On another 1.83 GHz Core 2 Duo laptop, this reduces the clock to about 1 GHz.
Don’t let that low clock speed scare you. I guarantee you that even on 3+ year-old laptop, basic tasks such as browsing the Web or running office applications will run without a noticeable performance difference. However, if you find the performance to be unacceptable, try increasing the processor states by an increment of 10% until you hit the perfect sweet spot. To enable the plan, simply go to the power plan selection screen and check “Maximum Battery Life.”
Step 2: Exporting your new and more effective power plan: If you’re in charge of an entire fleet of laptops, it might be wise to export this power plan as a handy file and deploy it over your network. Simply follow these steps: Open up a command prompt with administrative privileges (right-click on the “command prompt” shortcut and select “Run as administrator”). Enter
“powercfg list” to get a list of all power plans, including their GUID. Now, use the “powercfg –export” command to export your new power plan using its GUID. Syntax:Powercfg –export “C:\Power_plan_name.pow GUID”
Voila! The power plan is now ready to be deployed on any number of laptops using the “powercfg –import path\power_plan_name.pow” command. You could even include it in any custom Windows setup images for further deployment.
Recommendation #2: Lower Hardware Power Consumption
Before we talk about individual hardware components, the next big step to safe battery life is obvious: Dim the lights of your display! Use either the hardware keys or the “Power Options” feature in Windows 7 to turn the backlight down as far as you can. Also make sure that the Windows turns the display off as soon as its idle; this is also done via the power plan settings (see above).Windows 7’s hardware power management tries to power-down or selectively suspend many devices and buses. For example, it automatically turn off Wi-fi radios when they are not in use and puts Ethernet devices in a low power mode when no network cable is plugged in. Unfortunately, not all devices (or their drivers, see #3) support low power modes or manage them effectively. Use hardware keys on your laptop (if present), the OEM power management software (if pre-installed), or at the very least Windows Device Manager to turn off devices that you may not need on the road. Among them may be:
- Bluetooth radios
- WiFi devices
- Ethernet devices
- Blu-ray-/DVD-/CD-drives
- Webcams
- Firewire controllers
- IR Receivers
- Flash memory readers
- Keyboard LED background lighting
Turning off devices, however, can be a chore. It is not feasible if you need to do it manually or if you must preach to your ever-complaining IT workforce to perform these actions every time they board a plane or go for a long train ride. You need an automated solution.
The easy way: A handful of commercial third party products can automatically disable (at least some) devices. One noteworthy software solution is Battery Optimizer, which diagnoses power consumption of the most critical hardware components (as well as software processes), gives you an estimate on the potential battery life it can achieve, and lets you save energy just with a mouse-click.

Battery Optimizer is a neat solution for saving power with one click.
The techie way: A less costly alternative is a bit more complicated and not so sleek. Microsoft’s very own “DevCon.exe” is available from the Microsoft Knowledge Base (for Windows XP and Windows Vista) or in a more recent and 100% Windows 7 compatible version as a part of the Windows Driver Kit (read these instructions on how to extract the latest devcon version from the kit). This command-line tool can be used to disable devices based on either their unique hardware ID or hardware class. For a detailed list of Devcon commands (“Enable” and “Disable” especially will help your cause), this MSDN topic will help you out.
If you have one single hardware configuration across your enterprise, you can use devcon.exe to create a custom script which disables specific devices of your laptops at once and re-enables them, all with a single mouse-click. I suggest experimenting with devcon.exe a bit to see if it fits your needs and if you can use it in a custom script for your enterprise.
Here’s how it works: First, open Device Manager and find the specific device you’d like to disable, for example the network adapter. Go to its “Details” page and find either “hardware ID” or “compatible ID.” Now, use one of these IDs (the first works fine) to disable the device using devcon.com:

Step 1: Figure out the device ID and turn it off by using the “disable” parameter.

Recommendation #3: Every Performance Optimization is a Plus for Battery Life
In a world of blazing fast processors (the likes of a Core i7), optimizing Windows might not seem all that necessary at all. Unfortunately, it is vital part of keeping energy consumption at minimum levels. Remember that every single file operation, processor utilization, and memory transfer operation in your system causes your hardware to work more. Or at the very least, they keep it from entering a low-power state. While we limited the processor power in our first recommendation, a non-optimized Windows system will constantly keep your hardware working at higher energy-levels. Demanding processes (see also #4), background services, and scheduled tasks keep the CPU/GPU/RAM combination busy and might even frequently poll your devices (such as WiFi or Bluetooth adapters), preventing them from going into a sleep state.Here’s a quick checklist for a perfectly optimized system:
- Make sure that Windows Disk Defragmenter is active and performs its duties regularly.
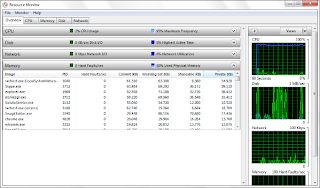
- Check Resource Monitor to determine if your laptop has enough RAM. If it runs out of memory, the page file on the (energy-consuming) hard disk needs to be accessed regularly. A RAM upgrade also helps reduce battery consumption and prevents performance bottlenecks.

- Click on the Start orb, type in “Resource Monitor” and hit Enter to launch this little helper.
- Go through the list of all installed programs very carefully; decide which ones are necessary and which aren’t. When you introduce new software in your ecosystem, make sure to perform battery benchmarks before and after. Compare the results!
- Kill Windows Aero while on the go. It’s not much, but it reduces the load on the GPU a bit.
- Learn all about active background tasks on your systems by opening up “Task Scheduler” (type it into your Start menu bar and click Enter). Find out what tasks are being executed at what time. Disable unnecessary tasks with a right-click or make sure that some tasks only start when the laptop is connected to AC power. To do that, double-click on a task (for example, Java Update Scheduler), go to “Conditions” and check “Start the task only if the computer is on AC power” as well as “Stop if the computer switches to battery power”

- Evaluate Windows or third party services, and disable services that are not explicitly needed in your infrastructure. To do that, go to your Start menu, enter “Services” and hit Enter.

In this example, “wmpnetwk” is responsible for an average of 6% CPU usage. A quick research reveals that this is the process name behind the “Windows Media Player Network Sharing Service,” which is definitely not needed on this specific system. It is quickly disabled from within Windows service management:

If you find program processes in this list, evaluate carefully if you need them during your day-to-day work, on the go. Disable them if not, or avoid using them constantly as much as you can!
Recommendation #4: Evaluate and Update Your Device Drivers

Pre-installed or inbox drivers are your worst choice – not only when it comes to saving battery life. Version 1 drivers are designed to “just make it work” and rarely are optimized for energy efficiency or performance. This is why it’s critical that drivers for all major hardware components of your laptop fleet are up-to-date, including the chipset, graphics card (onboard or dedicated), network adapter, and sound chip.
Here’s just one example of what a newer driver (in this case, for a Wi-Fi adapter) can do:

Depending on much time you’re connected to a Wi-Fi network, this might make a huge difference in battery life. But don’t assume that newer is always better. Newer drivers may also consume more power. I’ve seen that happen with a newer graphics driver that (due to a bug) prevented the GPU from clocking down accordingly, thus sucking up battery life much quicker.
My advice: Make sure to include a series of battery life benchmarks when evaluating drivers before rolling them out in your IT infrastructure.
Recommendation #5: Check the Status of Your Battery and Keep it Healthy
Windows 7 has a hidden — yet very neat — tool to measure the energy efficiency of your system. It shows if your current power plan has settings that need to be tweaked, what processes are causing high amounts of CPU usage (see #3), and which drivers put an unusual strain on your battery. It also shows you the current health of your lithium ion battery, which is extremely important to observe over time, especially after many hundred times of charging and discharging the battery. Here’s how it works:1. Open up a command prompt and type in the following command:
powercfg /energy2. Wait for the trace to finish and go to your user folder under “C:\Users\Your_username”. In it, you’ll find an HTML called “energy-report.” Open it!

Note: Go through all the major points of the analysis and figure out what you can do about all the errors or warnings found. Many of these problems can be solved with our first four recommendations!3. To get the current health status, scroll down until you find the “Battery:Battery Information” section. Take a close look at the “Design Capacity.” This is the original capacity in (in mWh) of your battery. After a couple of years and especially after heavy usage, this capacity will drop. The “Last Full Charge” value shows you the current charge:
If the second value reaches critical levels (lower than 60-70% of its original capacity), you might think about replacing the battery. If this is a newer machine, a low full charge value might be reason to contact the manufacturer and ask for a replacement.
In order for Lithium-Ion batteries to stay healthy for longer periods of time, you need to treat them carefully. Here’s some final bit of advice:
- Never discharge lithium-ion batteries completely (<0% battery life). In some cases this may damage the battery beyond repair. Allow partial charges and discharges! Lithium-Ion batteries don’t suffer from the “memory effect” of much older laptop batteries.
- Avoid extreme heat or cold. Try keeping them at room temperature!
Final Thoughts
After years and years of traveling I have incorporated and fine-tuned these recommendations. On every laptop I have ever owned or taken care of (e.g. in an administrative role) I was able to exceed the manufacturers battery life estimate — sometimes by a few minutes, in some cases by actual hours.Follow these five steps closely, both on your private laptop and in your business fleet, to ensure the best possible productivity for the mobile road warrior. It will be a struggle at first, finding the right balance between performance/functionality of your laptop and its battery life. After these suggestions and a short evaluation period, you will find the perfect balance. In the end, you’ll work more relaxed, knowing that on an international flight or a five hour train trip, you will still be working when all other screens have long gone dark.


3 Comments
Nov. Wall Street is currently looking for $60 million.
In fact, its strange to see a woman out and about with out them.
Luxury-apparel company michael kors handbags outlet Holdings Ltd.
I think one of the hottest shopping events on the retail
store openings for the second quarter.
Be the first to comment!
Don't just read and walk away, Your Feedback Is Always Appreciated. I will always reply to your queries.
Regards:
Noble J Ozogbuda
Back To Home